Keeping your hearing aids clean is super important – it helps them last longer and keeps your ears healthy. But with tons of cleaning kits out there, it’s easy to get lost. This guide will make it simple. We’ll show you why the right cleaning kit matters, compare some top picks, walk you through cleaning your hearing aids step-by-step (no matter what kind you have), and even share some pro tips from audiologists. You’ll learn how to keep your hearing aids in top shape for years to come and find the best cleaning routine for you. Let’s get started!
Hearing Aid Cleaning Kit: Your Guide to Clearer Hearing and Longer-Lasting Devices
Regular cleaning prevents wax buildup, keeps things hygienic, and helps your devices work their best. That’s where a good hearing aid cleaning kit comes in. This guide will help you navigate the options and master the cleaning process. It’s important to maintain not only the cleanliness but also the longevity of your sophisticated hearing aids.
Why Cleaning Matters: The Benefits of a Regular Routine
Neglecting hearing aid hygiene can lead to a host of problems. Excess earwax, dirt, and moisture can clog the tiny components, muffling sound and reducing amplification. This forces your hearing aids to work harder, shortening their lifespan and potentially leading to costly repairs. Moreover, bacteria and fungi can thrive in the warm, moist environment of a dirty hearing aid, increasing the risk of ear infections and skin irritation.
Regular cleaning, on the other hand, offers numerous benefits:
Optimal Performance: Clean hearing aids deliver clear, crisp sound, allowing you to hear conversations and environmental sounds with greater accuracy.
Extended Lifespan: Removing debris and moisture prevents damage to delicate components, prolonging the life of your hearing aids.
Improved Hygiene: Regular cleaning reduces the risk of ear infections and skin irritation by eliminating bacteria and fungi.
Reduced Repairs: Preventing clogs and other issues minimizes the need for costly repairs and maintenance.
Increased Comfort: Clean hearing aids feel more comfortable in your ear, reducing irritation and improving overall wearing experience.
Choosing the Right Cleaning Kit: Finding Your Perfect Match
The world of hearing aid cleaning kits can feel a bit overwhelming. From simple, budget-friendly options to advanced electronic cleaners, there’s a kit for every need and budget. The best choice depends on your hearing aid type, your cleaning habits, and how much you’re willing to spend. Are you seeking convenience, or do affordable options appeal more to you?
Do you prefer a quick, everyday clean, or do you want a more thorough, deep clean? Simple kits usually include a small brush, a wax loop for removing stubborn wax, and a cleaning solution. These are great for daily maintenance and are typically very affordable. More advanced kits often add electronic dryers to speed up the drying process and sometimes even include UV sanitizers to kill germs. These offer a more thorough clean and can extend the life of your hearing aids, but they come with a higher price tag.
Let’s break down the key differences related to hearing aid maintenance products:
Kit Type
Key Features
Pros
Cons
Approximate Price Range
Basic Cleaning Kit
Brush, wax loop, cleaning solution
Affordable, easy to use, portable, perfect for daily maintenance
Less thorough cleaning, may not be suitable for all hearing aid types
Very thorough cleaning, convenient, sanitizes, often includes storage, automated cleaning cycles
Most expensive, may need special cleaning solutions, bulkier than others
Over $100
Understanding Hearing Aid Types and Their Cleaning Needs
Before purchasing a cleaning kit, it’s crucial to understand the different types of hearing aids and their specific cleaning requirements:
Behind-the-Ear (BTE) Hearing Aids: These consist of a casing that sits behind the ear connected to a custom-molded earmold that fits in the ear canal. Cleaning involves detaching the earmold and washing it with warm, soapy water. Special care should be taken to clean the tubing connecting the earmold to the hearing aid.
Receiver-in-Canal (RIC) Hearing Aids: Similar to BTEs but smaller, RICs have the receiver (speaker) located in the ear canal. Cleaning involves wiping the receiver with a soft cloth and using a wax pick to remove any debris.
In-the-Ear (ITE) Hearing Aids: These custom-made hearing aids fit completely within the outer ear. Cleaning involves wiping the entire device with a soft cloth and using a brush to remove wax from the openings.
In-the-Canal (ITC) and Completely-in-Canal (CIC) Hearing Aids: These are the smallest custom-made hearing aids, fitting partially or entirely within the ear canal. Cleaning involves using a small brush and wax pick to remove wax and debris from the device.
Step-by-Step Cleaning: A Simple Guide to Sparkling Sound
Regular maintenance, including the right cleaning solutions, can extend the life of your devices. This simple routine will keep you hearing your best.
Remember: always check your hearing aid manufacturer’s instructions first. This guide provides general advice, but specific instructions might vary based on your device.
Step 1: Prep Work – Set the Stage for Success
Wash your hands thoroughly with soap and water. Clean hands prevent transferring dirt and germs to your hearing aids.
Gather your cleaning kit supplies. Having everything ready makes the process smoother.
Turn off your hearing aids. This is a crucial safety step.
Step 2: Removing Debris – Gentle but Thorough
Use the small brush to gently sweep away any visible dirt, dust, or debris from the hearing aid’s surface. Be careful not to apply too much pressure.
If you see wax buildup, carefully use the wax loop to gently remove it. Be extra gentle here; you don’t want to scratch or damage any delicate components. For BTE hearing aids, detach the earmold and clean it separately with warm, soapy water. Ensure it’s completely dry before reattaching.
For RIC hearing aids, pay special attention to cleaning the receiver (speaker) that sits inside the ear canal. Use a soft cloth to wipe it down and a wax pick to remove any stubborn wax buildup.
Step 3: Cleaning – A Spotless Finish
Apply a tiny amount of the cleaning solution to a soft, lint-free cloth. A little goes a long way.
Gently wipe the exterior of the hearing aid. Avoid getting any liquid inside the device – this could cause damage to electronic components. For BTE hearing aids, ensure the tubing is free from moisture and debris.
Inspect the microphone ports for any blockage. Use a vent cleaner or a thin wire to gently clear any obstructions.
Step 4: Drying Time – Let Your Hearing Aids Air Out (or Use a Dryer)
If your kit includes a dryer, follow the manufacturer’s instructions carefully. Electronic dryers are usually quick and efficient for hearing aid hygiene.
If you’re air drying, place the hearing aids in a well-ventilated area away from direct sunlight or heat. Allow them to air dry completely before using them again. Never use a hairdryer.
For electronic dryers, ensure the device is properly ventilated and follow the recommended drying cycle duration.
Step 5: Regular Maintenance – A Little Effort Goes a Long Way
Aim to clean your hearing aids daily, or at least every other day. Regular cleaning prevents wax buildup and significantly extends the life of your devices. This simple routine will keep you hearing your best.
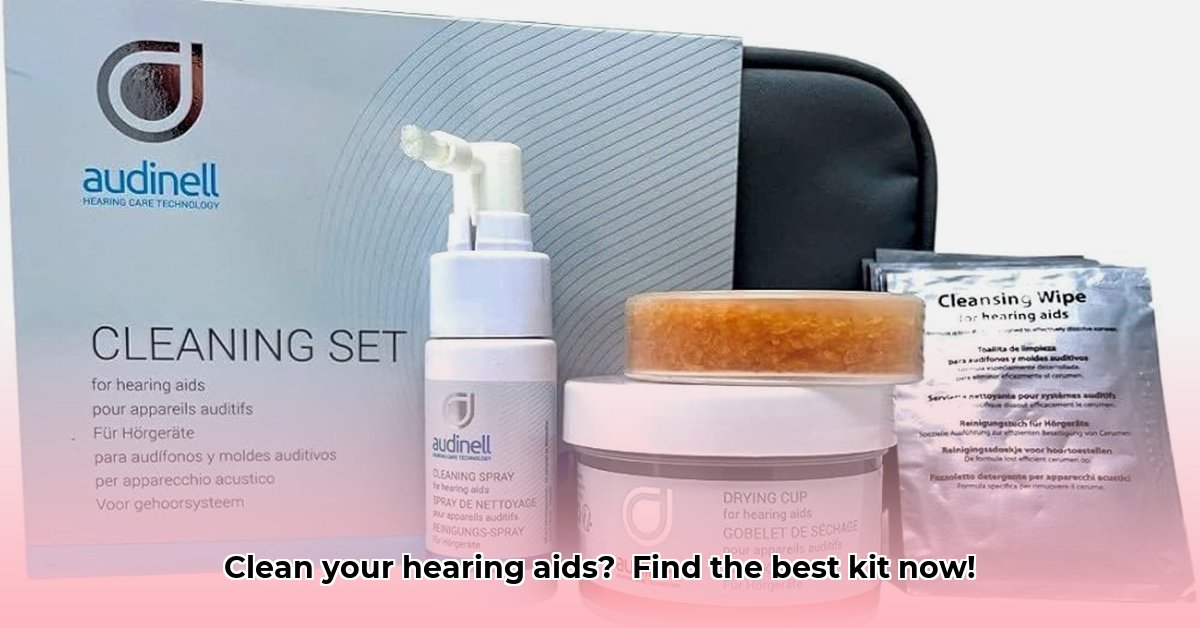
Popular Hearing Aid Cleaning Kits – A Quick Overview
While I can’t recommend specific brands, looking at user reviews before purchasing a kit is always a good idea. Pay close attention to comments about how easy the kit is to use, how effective it is at cleaning, and how durable it seems to be. Some kits may be better suited to certain types of hearing aids than others, so it’s worth doing your research. Wouldn’t you feel more confident choosing a product with consistently positive feedback?
Here are some general types of kits and what to look for:
Basic Kits: These are a great starting point and usually include a brush, wax loop, and cleaning cloth.
Deluxe Kits: These often include additional tools like vent cleaners, battery magnets, and drying beads.
Electronic Cleaning Systems: These offer the most comprehensive cleaning and drying and are often preferred by those with dexterity issues.
Travel Kits: Compact and portable, these are ideal for keeping your hearing aids clean on the go.
Remember, a hearing aid cleaning kit is a small investment that pays off big time. Regular cleaning contributes significantly to your hearing health and the long-term performance of your expensive hearing aids. Choose a kit that suits your needs and cleaning style, and commit to a regular cleaning routine. Enjoy clear, crisp
I am a writer specializing in health and lifestyle, committed to delivering well-researched, engaging, and insightful content. With a keen eye for trends and a deep understanding of health, presenting and exploring topics ranging from nutrition and mental health to sustainable living. This writing is solely intended to educate, inspire, and empower readers to live a healthier, more balanced life.