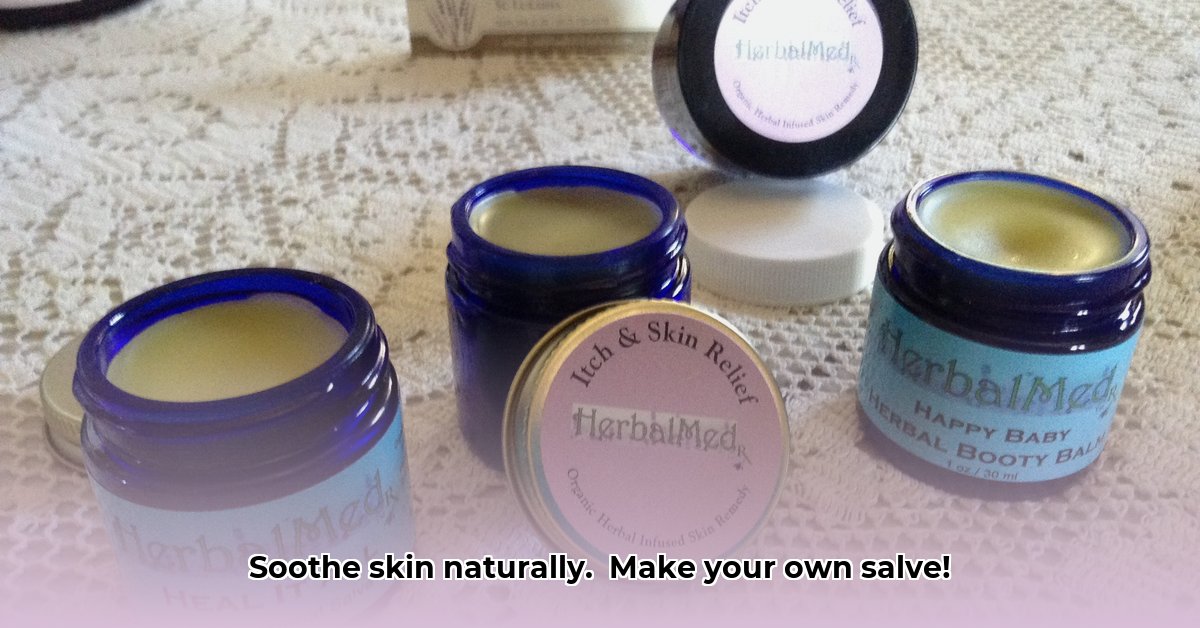
Want to create your own natural skin salve for soothing minor skin irritations? This easy instructional guide empowers you to harness plant-powered healing. From selecting appropriate herbs and quality oils to achieving the ideal smooth texture, we will help you craft a homemade herbal salve. Learn why homemade is best, explore the benefits, and discover ways to incorporate essential oils. For more in-depth information on herbs, check out this helpful herb guide.
Crafting Your First Herbal Salve: Ingredient Selection and Preparation
Ready to embark on making your skin-soothing herbal salve, a natural remedy for everyday skin irritations? It’s more attainable than you might think! This step-by-step guide will walk you through the process, from choosing the right herbs with beneficial properties to achieving the perfect consistency.
Selecting the Right Herbs for Your Skin
The effectiveness of your herbal salve hinges on the herbs that you choose. What specific skin concerns do you want to address? For example, if you are treating minor burns, Calendula, known for its anti-inflammatory benefits, makes an excellent choice. For scrapes, Comfrey is often suggested to aid tissue repair. If you are dealing with insect bites, Plantain is an herb that provides soothing relief. When you choose herbs for your homemade herbal salve, you directly impact its healing potential for your skin.
Consider these popular herbs and their benefits:
- Calendula: Anti-inflammatory, aids in healing minor burns and skin irritations.
- Comfrey: Promotes tissue repair, helpful for scrapes and bruises.
- Plantain: Soothes insect bites, stings, and minor skin inflammations.
- Lavender: Calming and antiseptic properties, beneficial for minor cuts and skin irritation.
- Chamomile: Anti-inflammatory and soothing, good for sensitive skin.
- Yarrow: Antiseptic and anti-inflammatory, helpful for wound healing.
- St. John’s Wort: May help with nerve pain and skin inflammation, but use caution as it can cause sun sensitivity.
It’s essential to research each herb and its potential benefits before you begin. Understand any possible interactions with other products you are currently using. Prioritize safety – testing a tiny amount on a small skin area is always a good idea, monitoring for any allergic reactions before applying more generously.
Essential Supplies: Preparing for the Salve-Making Project
Gather all necessary supplies before you begin mixing to ensure a seamless process. Prepare your ingredient checklist:
- Herbs: Have dried or fresh herbs in ready supply (about 1 cup). Fresh herbs can provide a slightly higher potency, but dried herbs come with storage convenience.
- Carrier Oil: You will need a quality carrier oil (about 1 cup). Consider olive oil, coconut oil, sweet almond oil, jojoba oil or grapeseed oil each providing unique benefits to the skin.
- Beeswax: You’ll need beeswax (1/4 to 1/3 cup). It gives your salve its texture and acts as a natural preservative. Add more for a firmer salve. Vegan alternatives include candelilla wax or carnauba wax.
- Heating: Use a double boiler or a heat-safe bowl and saucepan. The double boiler being the safest method to prevent burning.
- Storage: Secure a clean, airtight jar or tin for your salve’s storage, keeping it fresh. Amber glass is preferable to further protect the oils from light degradation.
- Straining: A fine-mesh strainer or cheesecloth will be used to filter out plant material post-infusion.
- Stirring: A spatula or spoon will be used for stirring.
- Thermometer: A candy or digital thermometer to accurately measure oil temperature during infusion.
Herbal Infusion: Extracting the Herbal Power
This step is where the herbs infuse their beneficial properties into the oil. You have two primary infusion methods:
- Cold Infusion (Slow): A gentle method to slowly infuse your herbs over 2 to 6 weeks. Place your herbs in your chosen oil within a cool, dark storage area. Ensure the herbs are fully submerged in the oil to prevent mold growth. The advantage of this method is that it preserves heat-sensitive compounds, yielding a potent salve. Gently shake the jar every few days.
- Warm Infusion (Speedy): This quicker infusion method takes 3 to 5 hours. Heat your oil and herbs in a double boiler or heat-safe bowl at 100-120°F (38-49°C). Consistent use of a thermometer to monitor carefully and avoid scorching. Never exceed 140°F (60°C) to preserve medicinal properties. A slow cooker on the “warm” setting can also be used. Turn off or unplug the slow cooker after a few hours to avoid overheating.
Strain your infused mixture carefully using cheesecloth or a strainer post infusion. Ensure removal of all plant material before continuing the process. Double strain using a coffee filter for an even smoother salve.
Incorporating Beeswax: Achieving the Ideal Texture
After infusing the oil, you’ll incorporate beeswax. Gently melt the beeswax with the infused oil through a double boiler or heat-safe bowl. Remember to stir continuously until a smooth consistency is reached. Thorough blending will prevent separation later.
To test the consistency, put a small spoonful of the mixture in the freezer for a few minutes. If it solidifies to your desired firmness, then the ratio is correct. Otherwise, add more beeswax for a firmer salve or more oil for a softer salve.
Cooling and Solidifying: Patiently Pouring
With the mixture fully blended, carefully pour it into your clean jar or tin. Allow it to cool to complete solidification. The cooling process might take several hours, depending on your environment’s temperature and the quantity made. Avoid moving the containers during the initial cooling phase to prevent cracking or unevenness.
Application Instructions: Using Your Herbal Salve
Congrats! You’ve successfully made your own herbal salve to aid in skin care. Apply a thin layer to affected areas as needed. Store the remaining salve in a cool and dark area to prolong its shelf life. Adding a few drops of Vitamin E oil can help extend shelf life as well.
Troubleshooting Common Issues
Problems occasionally arise when making salves. Below are some common issues and how to resolve them:
- Salve too thick: Add a bit more carrier oil, gently reheat, and stir to your preferred consistency.
- Salve too thin: Add beeswax, reheat, and stir together.
- Grainy texture: This can happen if the beeswax cools too slowly or unevenly. Reheat the salve gently and allow it to cool undisturbed.
- Presence of mold: If you see mold, discard the batch. Sterilization and proper storage are imperative to avoid this. Ensure herbs are fully dried before using them in the infusion process.
Safety First: Important Guidelines
Consider these important points before you begin:
- Patch Test: Always test the salve on a small skin area before applying liberally, mitigating allergic reactions. Wait 24-48 hours to observe for any adverse reactions.
- Medical Advice: Pregnant or breastfeeding individuals, and those with pre-existing conditions, should consult a doctor before use.
- Quality Ingredients: Utilize high-quality, food-grade ingredients. Organic herbs are preferable to avoid pesticide contamination.
- Sterilization: Sterilize all equipment by boiling in water for 10 minutes or washing in a dishwasher.
- Sun Sensitivity: Exercise caution with herbs like St. John’s Wort, which can cause increased sun sensitivity. Apply the salve at night or use sun protection during the day.
While herbal salves can be a great addition to your self-care routine, they aren’t a replacement for professional medical attention. Share your creations using #HomemadeHerbalSalve.
Choosing the Perfect Carrier Oil: A Guide to Homemade Herbal Salves
Key Points:
- Cold-pressed, unrefined carrier oils offer superior nutrient content.
- Consider an oil’s comedogenicity rating, especially for applications on the face.
- Select herbs based on desired therapeutic outcomes.
- Be aware that the shelf life of carrier oils can vary.
- Using dried herbs prevents spoilage during infusion.
Crafting soothing herbal salves? Let’s discuss the base: carrier oils. Choosing the right oil is crucial for effectiveness and skin health. This guide helps navigate your options.
Understanding Carrier Oils and their Functions
Carrier oils dilute potent herbal extracts, easing application and contributing to the salve’s texture and moisturizing benefits. Common choices include olive, coconut, and sweet almond.
What makes an oil superior? That depends on your skin’s needs.
Selection Factors: Key aspects to consider when choosing a Carrier Oil
- Skin Type: Oily, dry, or sensitive skin? Jojoba oil is often recommended for oily skin due to its similar composition to sebum. Consider the rich emollients in shea butter or coconut oil for dry skin.
- Desired Outcome: Treating dryness, inflammation, or minor wounds? Certain oils have specific benefits. Rosehip seed oil offers regenerative qualities.
- Comedogenicity: This indicates how likely an oil will clog pores. If the salve is for the face, prioritize low-rated oils (0-2).
- Scent and Texture: Some oils have stronger scents, while others have textures that vary from light (jo
- Mindfulness Activities PDF Offers Free Worksheets and Exercises - February 23, 2026
- Meditation Guide Book Picks from Top Mindfulness Teachers - February 22, 2026
- Best Books to Start Meditation for Beginners and Skeptics - February 21, 2026


